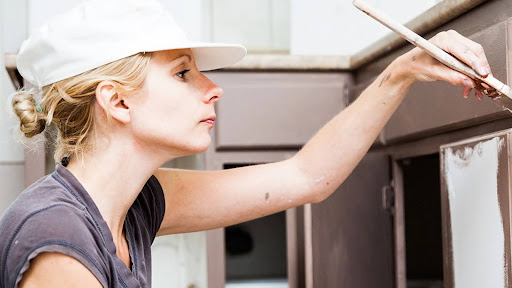
Do you want to significantly improve your kitchen? Consider taking up kitchen cabinet painting., it can bring fresh life and brightness to your room.
Painting kitchen cabinets is an easier more affordable option than replacing them. besides having a beautiful aesthetic, DIY kitchen cabinets provide you the satisfaction of personally adding to the design and aesthetic of your house.
Painting your kitchen cabinets is an affordable way to give your kitchen an updated appearance. Because the kitchen is a special space in your house, keeping it in good condition may make it an excellent gathering spot for you, your family, and your friends. It can also increase the value of your home. Here are some things to consider before you begin.
Choose the Right Paint Color
Consider the other components of your kitchen when choosing the color of your cabinets. To create a harmonious palette, make a list of the elements you already like including the hardware or fixed appliances. Your countertops should go well with your kitchen cabinetry. Which paint shade would bring attention to your backsplash? Which color would contrast most with the floor?
- Green has become more popular in kitchens in many different shades, giving it a great starting point if you prefer bright or earthy tones.
- White paint is a basic choice that usually complements what’s already in your kitchen, but it can reveal stains and dirt easily
- Consider black for your kitchen cabinets for a dramatic and sophisticated effect.
Steps For Painting Cabinets:
Prep the Room for Painting Cabinets
- Begin by emptying the cupboards, removing any freestanding equipment, and cleaning the counters.
- Move tables and other furniture to a different room.
- Tape rosin paper over the counters and flooring, and plastic sheeting over the backsplash, windows, fixed appliances, and internal doorways to protect the rest of the house from dust and fumes.
- Mask off the area surrounding the cabinets on the wall.
- Make a workstation for painting doors, drawers, and shelves.
Detach the Doors, Drawers, and Shelves
- To avoid door confusion, label each drawer front and door with a marker. The best spot for this mark is behind the hinge.
- Remove the doors by unscrewing the hinge screws from the cabinet frame.
- Label each one with a numbered piece of tape, working from left to right and top to bottom. Also, count the edges of cabinet shelves and drawer bottoms.
- Set the shelf-hanging hardware aside.
- Remove the pulls and hinges and save what can be reused.
Ensure that all surfaces are clean
- Spray a degreaser solution on the cabinet and wipe it down with a rag to clean it. This eliminates any oils or grease that can prevent a perfect finish. If regular cleansers aren’t working, try a harsher cleaning like trisodium phosphate (TSP), which is available at hardware and paint stores. Simply observe the safety recommendations on the packaging.
- Once all cabinet parts are clean, thoroughly rinse them with water and allow them to dry.
Prep the boxes.
- Put on your safety gear and open the windows for ventilation. Scrub all of the surfaces with an abrasive pad dipped in a liquid deglosser.
- Keep a towel beneath to collect any drips. Wipe away the remains rapidly with another clean, deglosser-dampened rag before the deglosser evaporates.
- Fill the old screw holes with a two-part polyester wood or autobody filler if you are relocating the hardware.
- It hardens in about 5 minutes, so work in tiny quantities.
- Remove the excess with a sharp paint scraper as soon as it has dried. If it has completely hardened, sand it smooth.
- Sand the cabinet, drawers, and doors with a foam sanding block. Don’t sand to the bare wood because this is just light sanding to give the primer something to stick to. Before continuing, use a tack cloth to remove the sanding dust.
- Vacuum the cabinets inside and out to remove any dust, then wipe them down with a damp cloth for a final cleanup.
Prime the cabinet boxes
- Pour primer into the paint tray.
- Load both a brush and a roller.
- Use the brush for edges and tight areas, and the roller for large, flat surfaces. Apply primer to cabinets, doors, and drawer fronts.
- Start at the top of the cabinet and brush across the grain. Then, lightly brush in the direction of the grain in one continuous stroke.
- Follow the cabinet’s structure. Paint rails first, overlapping slightly onto the stiles, and then paint the stiles before the overlap dries.
- Allow the primer to dry.
- Wash your brush and roller sleeve.
- Pour any leftover primer back into the can before cleaning the paint tray.
Fill, Sand, and Caulk
- Sand the flat surfaces with 220-grit paper after the primer is dry.
- Using a medium-grit sanding sponge, sand any profiled surfaces. The wood should feel glass-smooth in the end.
- Fill any open seams with a thin bead of latex caulk. (The hole in the tip of a caulk tube should not be bigger than the tip of a sharp pencil.)
- Pull the caulk tip as you go, then smooth it with a damp finger. Fill in any small dents, scratches, or dings with vinyl spackle.
- After the spackle has dried for about sixty minutes, vacuum, sand again using 220 grit paper, and then wipe with a tack cloth.
- Apply a quick-drying oil-based primer spray can to the spackle and any areas where the primer has been burned through by the sandpaper.
- After waiting an hour, lightly sand the primer using 280-grit paper.
- Use a tack cloth to clean down all the surfaces, and vacuum them.
Apply Paint to the Cabinets
- Fill the paint tray with trim and cabinet enamel paint, then load the brush and roller with the paint.
- Use a smooth-surface small roller to apply paint to the cabinet interior. This will leave an orange-peel-like texture that is slightly rough.
- When you wait for the first layer to dry, cover the brush and roller with plastic bags to keep them from hardening.
- Sand the surfaces gently in between coats, be careful to remove any leftover debris.
- Coat the cabinet one more time. This coat will keep the wood perfectly and consistently finished, with no bright or thin spots.
Reattach All The Parts
- Reattach the cabinets once the second coat has dried.
- After installing the hinges and knobs and hanging each door in its original opening.
- Reinstall each drawer after changing the pulls or adding new ones.
The Verdict
Painting your kitchen cabinets can make a big difference in your kitchen’s look and feel. It’s a cost-effective way to refresh your kitchen without the need for a full renovation. Besides, it allows you to express your style and design preferences.